Essentials
Android Studio with the Flutter Framework and the Flutter Rust Bridge.
Managing the SDKs
The SDK Manager is used for managing the software development kit (SDK) components of the Android platform. Its primary purpose is to facilitate the installation, removal, and updating of various SDK packages required for developing Android applications. It allows also to manage and update various SDK Tools that are part of the Android development toolkit, such as the Android SDK Build Tools, the Native Development Kit (NDK), and more.
How to open SDK Manager
Start Android Studio. You can open the SDK Manager in one of the following ways:
- via the "Welcome to Android Studio" Page:
If this page is open, there is dropdown menu "More Actions". Open it and select "SDK Manager". - via the "Tools" Menu:
If Android Studio is open, open the "Tools" menu. You will find the item "SDK Manager". - via the "Settings":
Open the "Settings..." in the "Android Studio" menu.
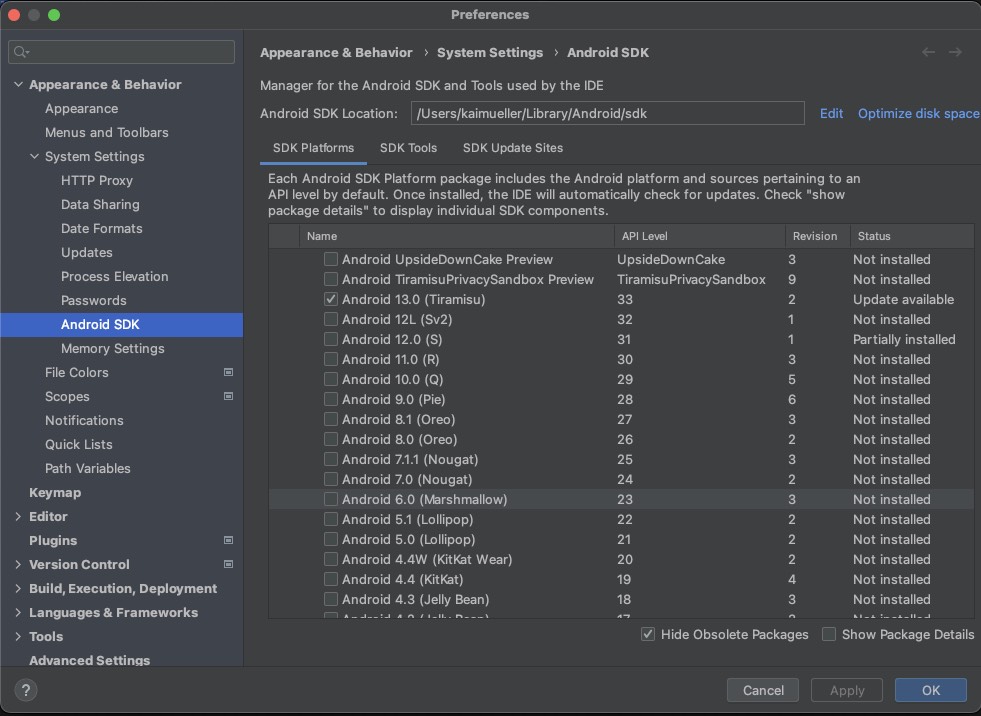
In the window, select the "Appearance & Behavior" -> "System Settings" -> "Android SDK" section.
Hint: The Android SDK Location can be found here, too.
SDK Platforms
To start the development with Flutter use the latest Android SDK Platform.
SDK Platforms
SDK Tools
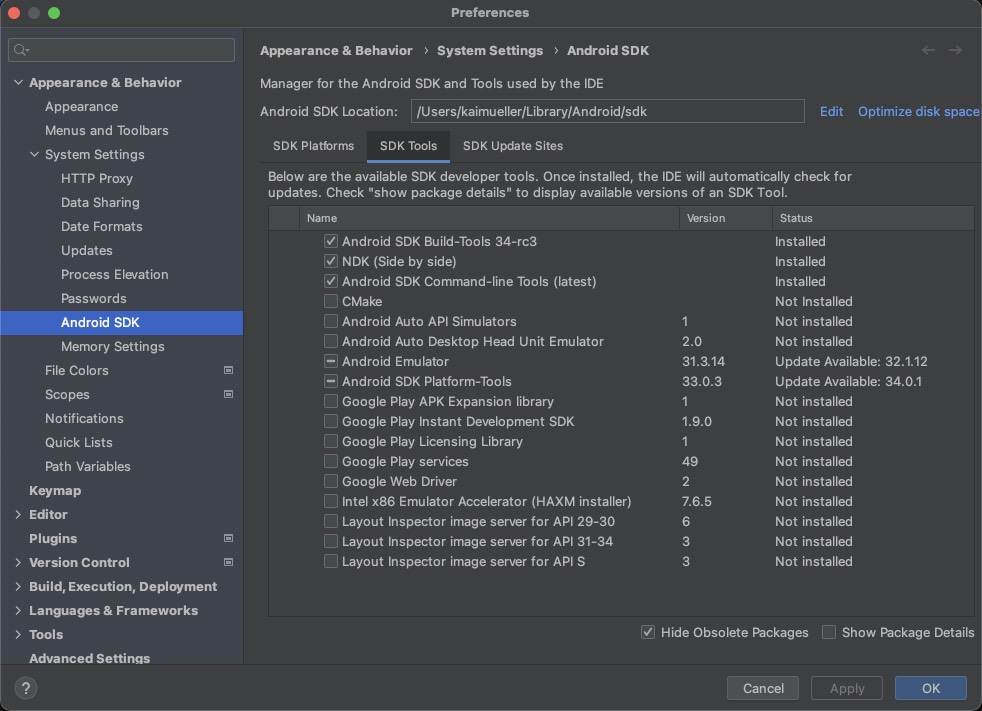
In the second Tab, you can select the SDK Tools.
For Flutter development, select:
- Android SDK Build-Tools
- Android SDK Command-line Tools
- Android Emulator
- Android SDK Platform-Tools
To use the Flutter-Rust-Bridge, also select:
- NDK
SDK Tools
Managing the Virtual Devices
The Virtual Device Manager is a tool used for managing and creating virtual devices, also known as emulators. Emulators are software-based virtual devices that simulate the hardware and software configurations of real Android devices, allowing developers to test and run their applications without needing physical devices.
How to open the Virtual Device Manager
Start Android Studio. You can open the Virtual Device Manager in one of the following ways:
- via the "Welcome to Android Studio" Page:
If this page is open, there is dropdown menu "More Actions". Open it and select "Virtual Device Manager". - via the "Tools" Menu:
If Android Studio is open, open the "Tools" menu. You will find the item "Device Manager".
Which Virtual Device?
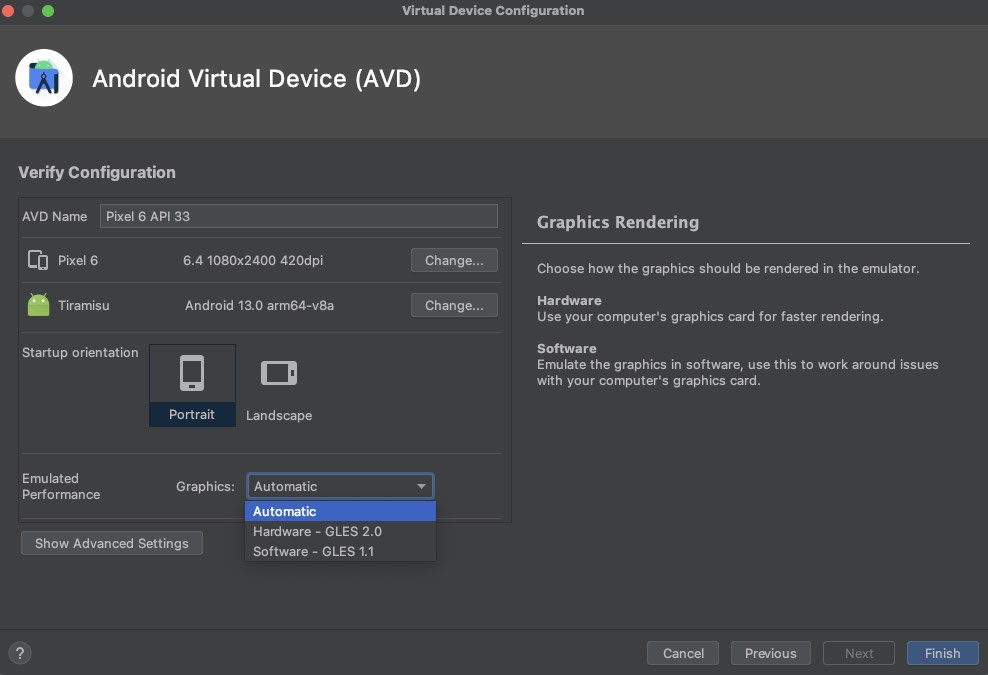
If you don't have a Virtual Device yet, click on "Create Device".
- Choose a phone, e.g. the "Pixel 6" or "Pixel 3a"
- As system image, choose the one corresponding to the installed Android SDK platform!
Keep the ABI in mind, here "arm64-v8a". The ABI information is used to configure the build.gradle file later, in the context of the Flutter-Rust-Bridge configuration. - For better performance, choose "Hardware - GLES 2.0" for Graphics.
Create a Virtual Device
Device File Explorer
Open the Virtual Device Manager and start your Virtual Device by clicking on the Play button. You'll notice that there is section called "Device File Explorer".
Later on, you can refer to the following location to retrieve information regarding stored files (RockDB, Stronghold Snapshot file) in your application's filesystem.
Path to AVD's filesystem: Root -> data -> data -> {app.id}
AVD filesystem
For your information, the location of the cross-compiled Rust library can be found here:
Root -> data -> app -> {temporary folder - use date to find the correct one} -> {app.id} -> lib
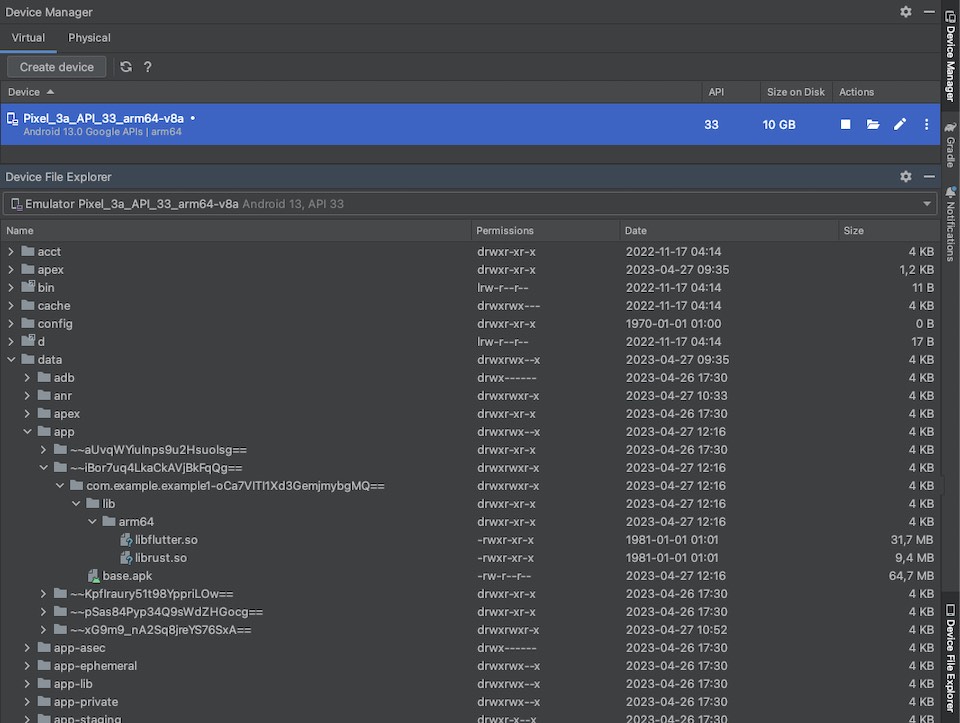
Location of the cross-compiled Rust library librust.so