Building for macOS
Completing the remaining steps for macOS.
Everything is repeating. So in this section, I consolidate all the macOS instructions outlined in the previous chapters:
- FRB Template App - modified Workflow -> macOS instructions
- Building a Simple App -> Building for macOS
macOS Steps
To integrate our Rust backend, we create an additional Xcode project first and add it as a "subproject" to the existing Flutter Xcode project (macos/Runner.xcodeproj). During the build, the inner Xcode project is built first, enabling its use by the parent project.
Create the XCode project for our Rust library
An common step for macOS / iOS is needed: creating an Xcode project inside of the Rust library project folder (rust/). This can be done using the cargo-xcode command.
I utilize cargo-xcode v1.5.0 to ensure smooth operation. For example, when I employed version v1.9.0, Xcode flagged an issue regarding the absence of a development team for signing (but: I couldn't add a development team because the "Signing & Capabilities" tab is missing for the target rust-cdylib in the Rust Xcode project).
-
To install the
cargo-xcodecommand use:cargo install cargo-xcode@1.5.0 -
After the installation of the command, create the Rust Xcode project. Make sure to be in the rust/ directory. From the project's root folder you may switch into the right directory:
cd rustcargo xcodecd .. -
This step is for macOS only because the macOS app uses the dynamic library:
Open up that
rust/rust.xcodeprojfile with Xcode and select the root item rust, at the left pane on top. Select the Target rust-cdylib and the Build Settings tab. Here, search for Dynamic Library Install Name Base and change the value into$(TARGET_BUILD_DIR).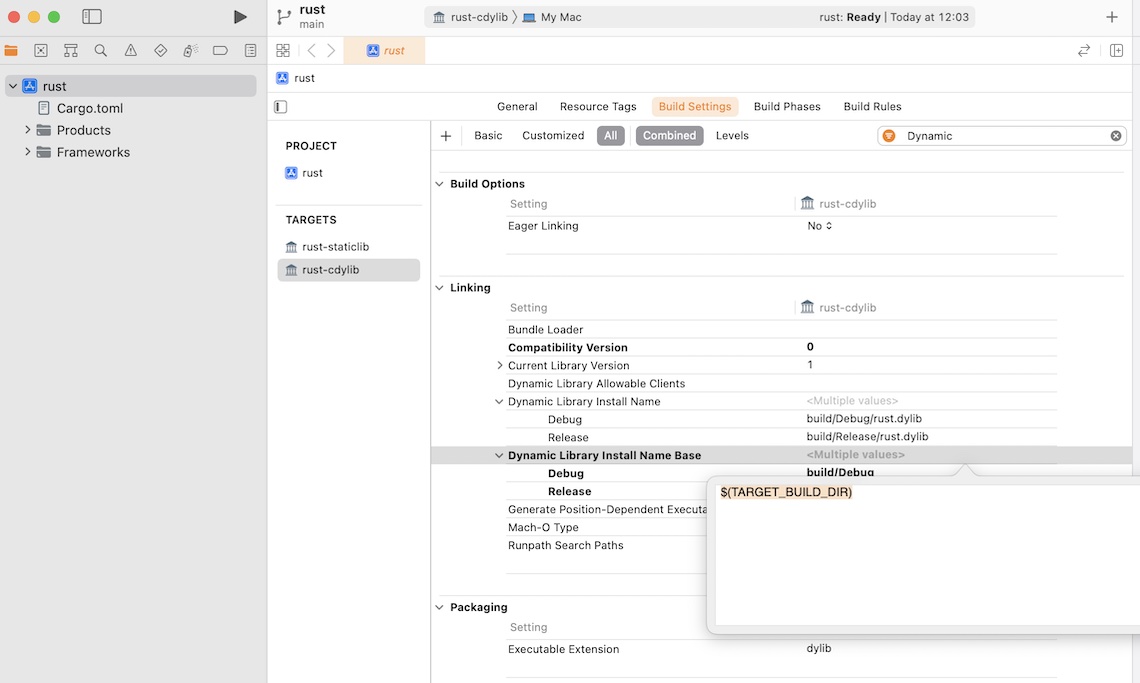
Dynamic Library Install Name Base
Merge both projects
We need to incorporate the new Rust XCode project (rust/rust.xcodeproj) into our Flutter XCode project which was created inside the macos folder when Flutter initialized our project.
Simply open the macos/Runner.xcodeproj in Xcode, open the rust/ directory in Finder and drag the rust.xcodeproj into the Runner folder. The next images will illustrate the steps.
Open Runner.xcodeproj
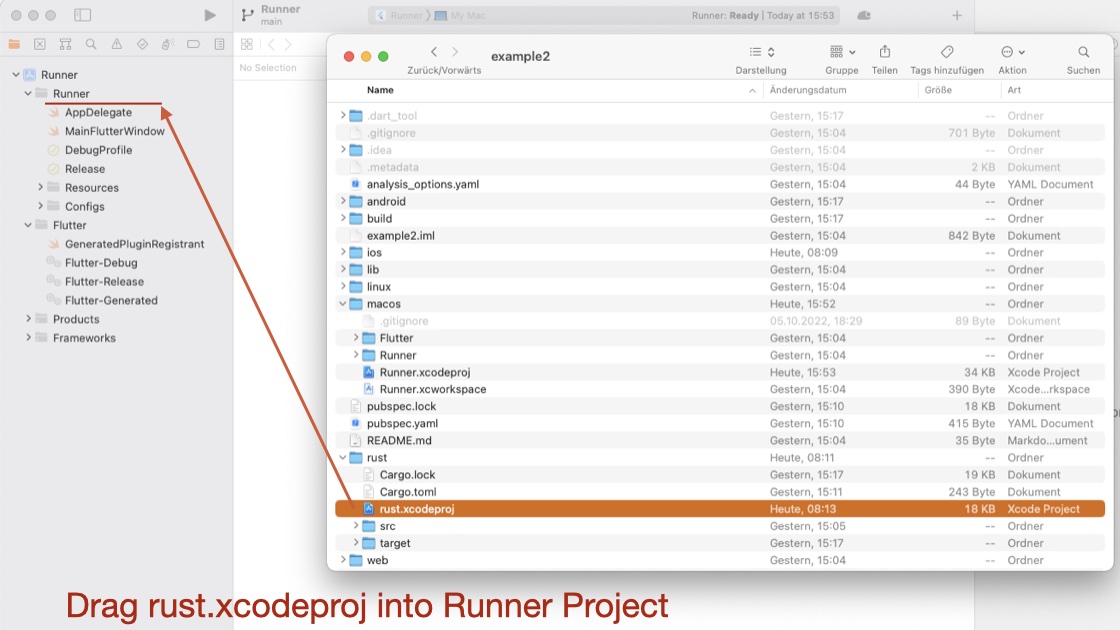
Drag the file rust.xcodeproj into the Runner Project
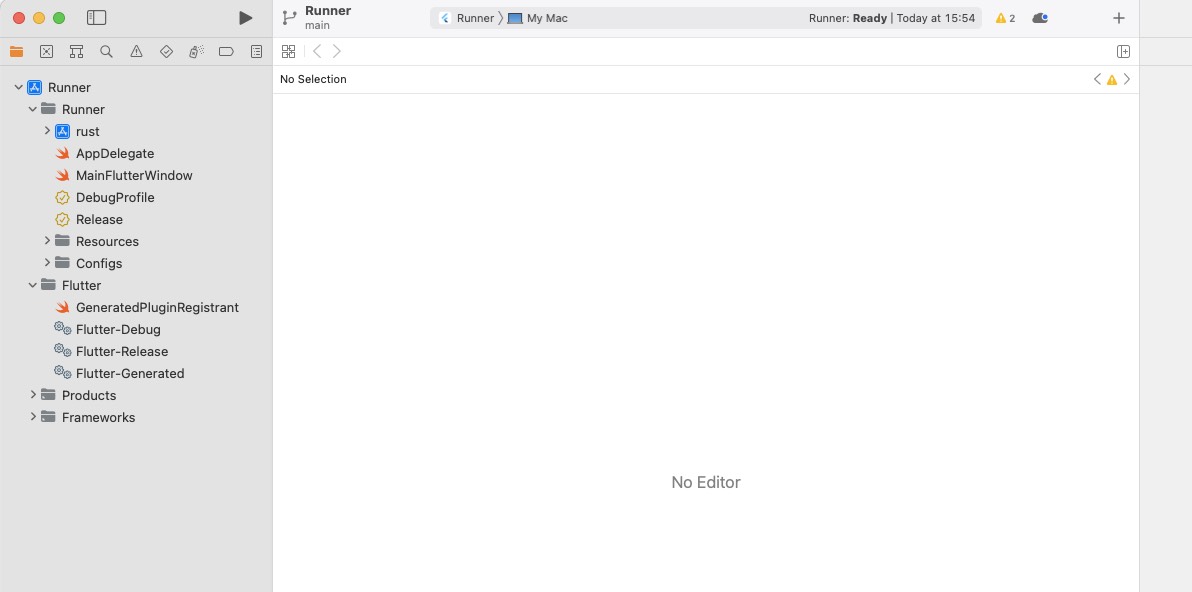
The new subproject
Adjust the Runner Target's Build Phases
For macOS, FRB recommends to include the dynamic library.
a) In Runner Target's Build Phase -> Target Dependencies:
Click on "+" and select rust-cdylib.
b) In Runner Target's Build Phase -> Link Binary with Libraries:
Click on "+" and select rust.dylib.
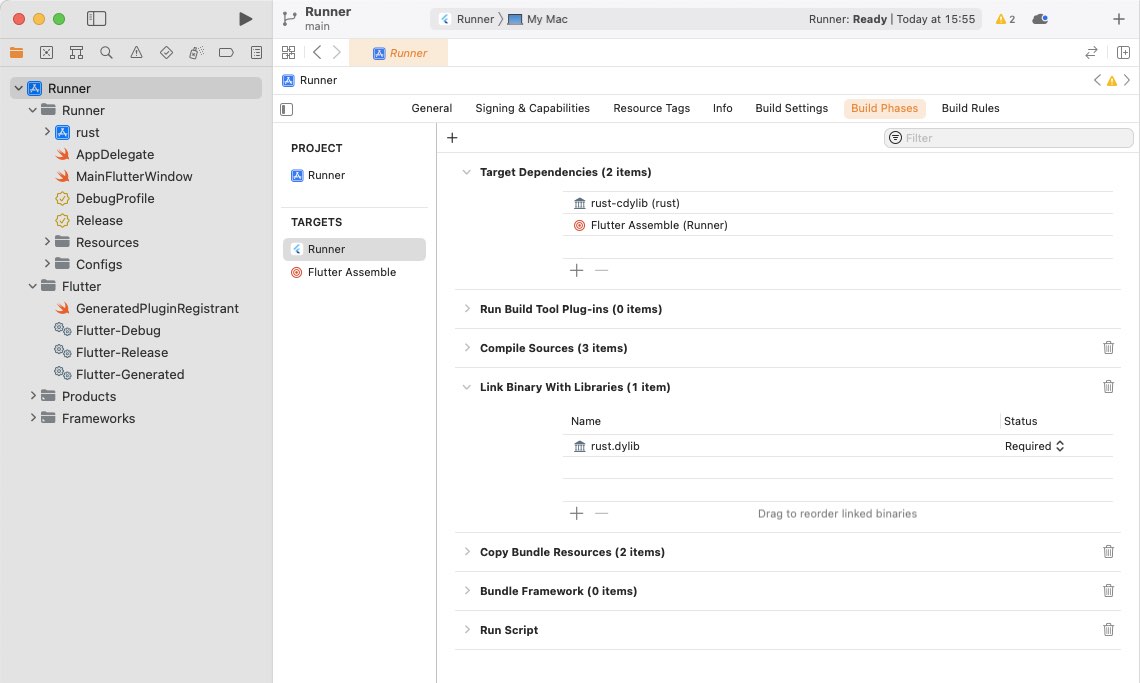
Adjusted Build Phases
Adjust the Runner Target's Build Settings
Start typing "Objective-C Bridging Header" in the filter... the hard-to-find setting is in the Swift Compiler - General section of the settings.
As value, insert:
Runner/bridge_generated.h
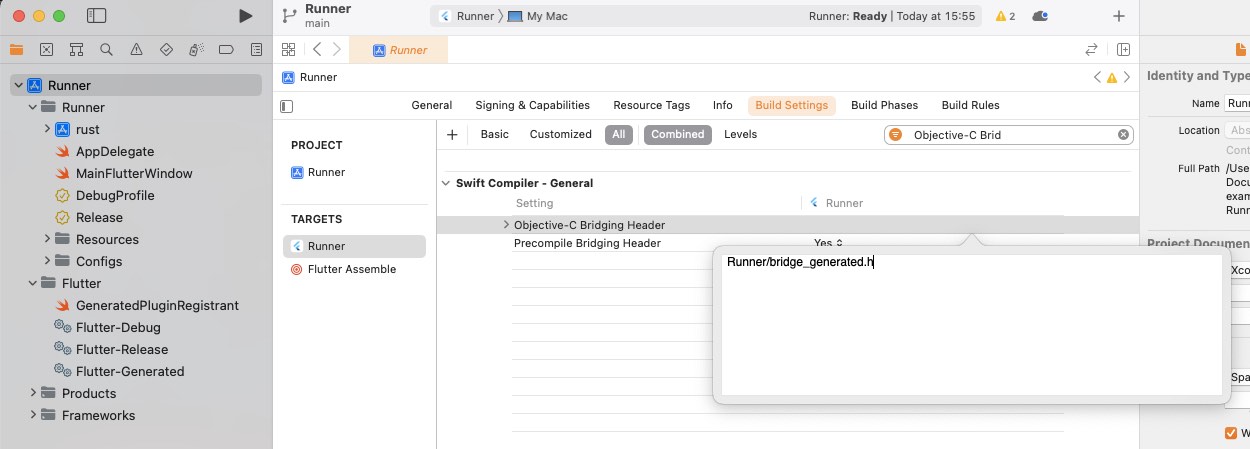
Adjusted Build Settings
Adjust Minimum Deployments
To ensure that your app can run on your host computer and Xcode version, you may only be able to support newer macOS versions. To set the minimum supported macOS version for your app, go to the General tab and select macOS version 13.1 as the Minimum Deployments target.

Adjusted Minimum Deployment
Generate the Dart Interface
Our next task is to create the generated code. This will also copy the C header file bridge_generated.h into the folder macos/Runner/. Use this command (you need to be in the root of your project):
flutter_rust_bridge_codegen \
--rust-input rust/src/api.rs \
--dart-output ./lib/bridge_generated.dart \
--dart-decl-output ./lib/bridge_definitions.dart \
--c-output macos/Runner/bridge_generated.h
Adjust the AppDelegate.swift file
Switch to Visual Studio Code and open the file macos/Runner/AppDelegate.swift. We need to call the function dummy_method_to_enforce_bundling() (from FRB) somewhere to avoid that Xcode handles our library as dead code.
Add:
dummy_method_to_enforce_bundling()
Your file should look like:
import Cocoa
import FlutterMacOS

@NSApplicationMain
class AppDelegate: FlutterAppDelegate {
  override func applicationShouldTerminateAfterLastWindowClosed(_ sender: NSApplication) -> Bool {
    dummy_method_to_enforce_bundling()
    return true
  }
}
Add the Security Entitlement
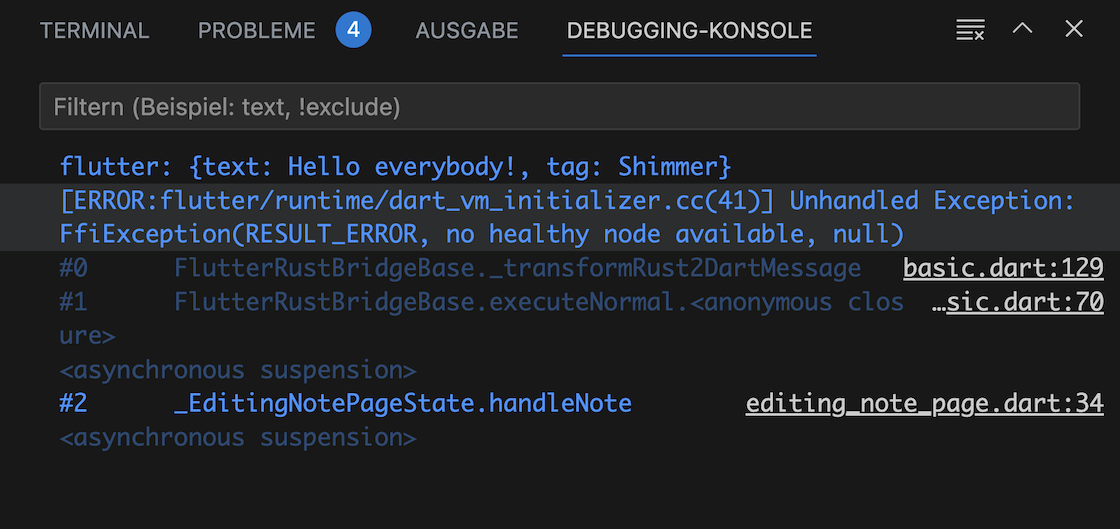
No healthy node available
macOS applications are sandboxed by default. To avoid a SocketException, you need to add the network.client entitlement to macOS/Runner/DebugProfile.entitlements:
<key>com.apple.security.network.client</key>
<true/>
Video
The video summarizes all remaining steps.