Initialize the Flutter App and Setup the Flutter-Rust-Bridge
Watch the video! We start by cloning the pure Flutter project that includes everything but the backend calls.
GitHub Repository
👉 GitHub Repo - Playground App (Flutter only)
Setup steps according to the video
% cargo new --lib rust
% cargo install flutter_rust_bridge_codegen
% flutter pub add --dev ffigen && flutter pub add ffi
% flutter pub add flutter_rust_bridge
% flutter pub add -d build_runner
% flutter pub add -d freezed
% flutter pub add freezed_annotation
[dependencies]
flutter_rust_bridge = "1"

[lib]
crate-type = ["staticlib", "cdylib"]
Facing a problem with missing gradle files?
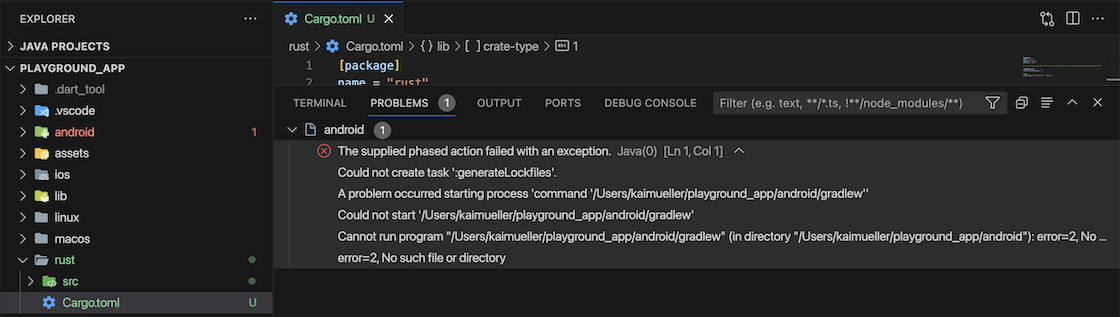
After cloning: there are missing Gradle files
Are you encountering the "Could not create task ':generateLockfiles" issue after cloning the project and launching VSCode? Here's the cause: Gradle files are absent in the Android subfolder at this stage. These files are fetched when you initially run the project on your Virtual Android device. To resolve it, follow these steps: Run the Flutter app on your Android device, stop it, and then restart VSCode. The error should disappear.
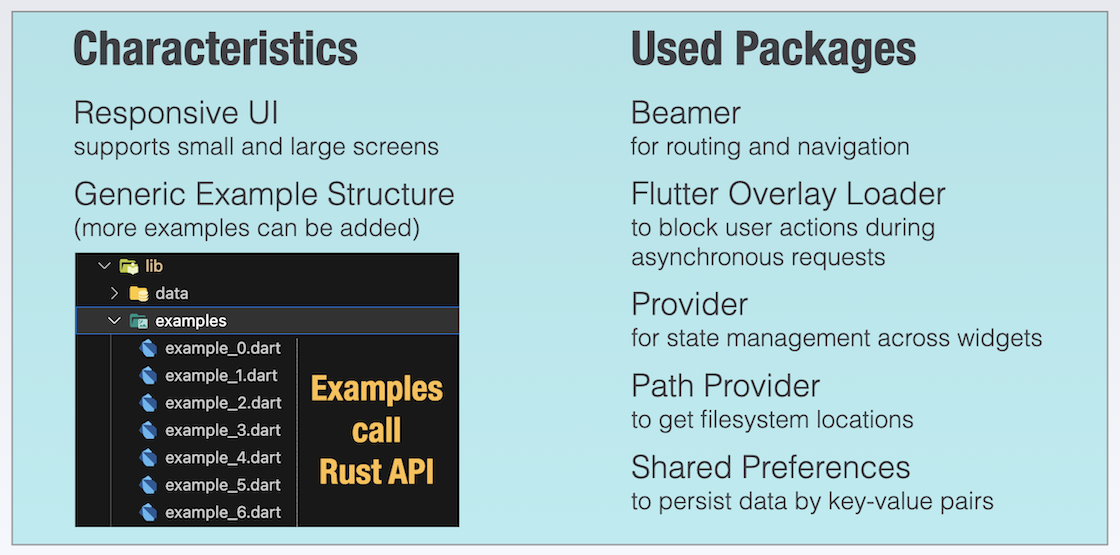
App Characteristics and used Packages
Playground App - Flutter Part
Example Structure
This is a brief explanation of the Example Structure. The examples contain the core functionality of the app and implement the integration with the Rust interface. If you're interested, you can also add your own examples.
Each Example consists of a sequence of ExampleSteps, which have a similar structure.
It's a minor detail: The numbering of Examples and ExampleSteps begin with 1 in the User Interface, but in the code, the index starts with 0. Therefore,
example_0.dartcorresponds to Example 1, and so on.
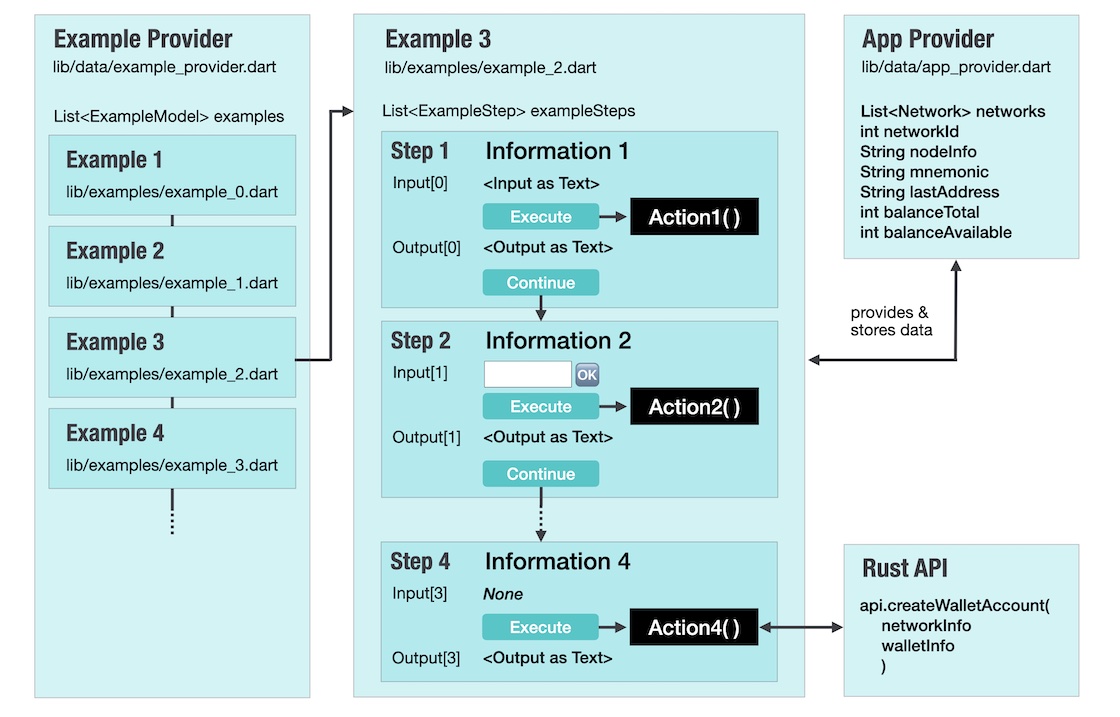
Example Structure
Along with a title and an information text, an ExampleStep can display an input value as text and/or as an input field.
The "Execute" button invokes a function that can be freely defined. After executing the action, it is useful to present an output text to the user. The action can be repeated any number of times, but in order to proceed to the next step (by clicking the "Continue" button), it must be executed at least once. In the last step, there is no "Continue" button.
The App Provider can be used at any point to retrieve stored data or to store new or updated data.
In my examples, I generally follow a pattern where I use the first step for resetting or entering values, and intermediate steps when I require multiple data inputs from the user to execute the final step. The final step always involves calling the Rust API method.
Important
Some examples assume that previous examples have been executed and the data generated during those executions is stored in the app. For example, the third example (Create Wallet Account) assumes that mnemonics were generated in Example 2. It is best to follow the sequence of executing all the examples one after another, starting with "Get Node Info," when using the app for the first time.
A hidden feature is located behind the "Input" and "Output" labels. When you click on either of these labels, the content of the input or output will be copied to the clipboard.